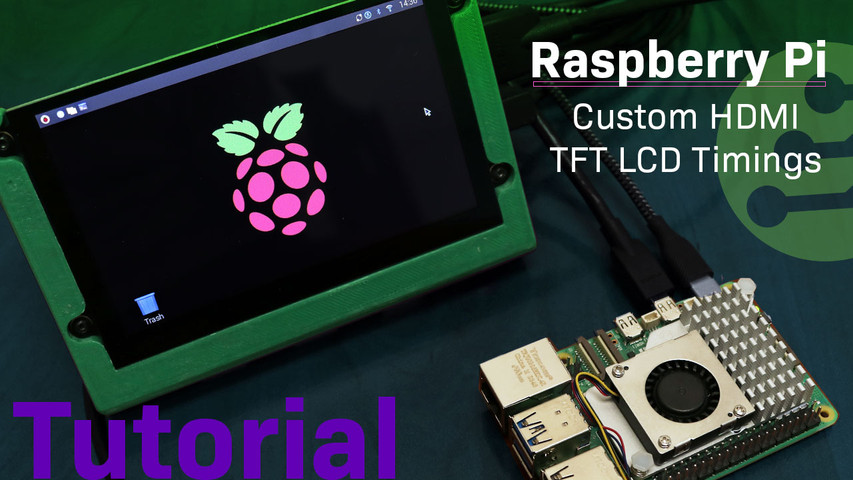
Raspberry Pi Custom HDMI TFT LCD Timings
Setting up custom timing for HDMI TFTs and Touch HDMI Displays on Raspberry Pi can significantly enhance display performance and compatibility. This guide will walk you through the steps needed to configure your Raspberry Pi 3, 4, or 5 for custom TFT timings.
In this article:
Hardware and Software Requirements
To set up and use a TFT display with your Raspberry Pi, you'll need the following hardware and software. While any HDMI-compatible TFT display should work, for this guide, we will be using the 5.0” IPS Capacitive HDMI TFT Module – Part Number: NHD-5.0-HDMI-N-RSXP-CTU.
- For Raspberry Pi 3:
- Raspberry Pi 3
- Micro USB power supply
- For Raspberry Pi 4 and 5:
- Raspberry Pi 4 or 5
- USB-C power supply
- Other components common to all versions:
- Keyboard and Mouse for Pi
- Windows/Mac/Linux Computer
- TFT Display (NHD-5.0-HDMI-N-RSXP-CTU)
- HDMI cable
- MicroSD card
- Raspberry Pi OS (specific distro may vary)
- Internet connection for downloading necessary tools
Step 1: Install Raspberry Pi OS
- Download Raspberry Pi Imager
- Go to the official Raspberry Pi website and download the latest version of Raspberry Pi Imager for your operating system (Windows, macOS, or Linux).
- Insert your microSD card into your computer
- Flash the OS onto the microSD Card
- Open Raspberry Pi Imager, select your Raspberry Pi model, OS, and microSD card, then click Next to proceed. Optional: You can also use Balena Etcher to flash the OS.
- Safely eject the microSD card from your computer
What is flashing an SD card?
Flashing an SD card involves writing a disk image (such as an operating system) onto the card so that it can be used to boot a device, like a Raspberry Pi. Software tools like Raspberry Pi Imager or Balena Etcher are used to accomplish this, as they handle the formatting of the SD card and copy the necessary files to prepare it for use with your device.
Step 2: Verify Raspberry Pi OS Installation
- Insert the microSD card and connect the power supply to the Raspberry Pi
- On the first boot, the Raspberry Pi will initialize the system. If connected to a monitor, you should see the boot sequence.
- Follow any setup prompts for configuring the language, Wi-Fi, etc., if this is your first time booting the device.
- Verify OS installation
- Once the boot process completes, you should see the Raspberry Pi desktop or the command-line interface, depending on the OS version. This confirms the OS was installed successfully.
- Shut down the Raspberry Pi
- Safely shut down the Raspberry Pi using the shutdown option or by entering:
sudo shutdown now.
- Safely shut down the Raspberry Pi using the shutdown option or by entering:
- Remove the microSD card
- After the Raspberry Pi powers off completely, remove the microSD card.
Step 3: Access the config.txt File
- Insert microSD card into your computer
- Open config.txt
- Navigate to the root directory of the microSD card and find the
config.txtfile. Open it using a text editor such as Notepad++, TextEdit, or any code editor.
- Navigate to the root directory of the microSD card and find the
Step 4: Add Custom Display Timings
- Get display specifications
- To set custom timings, you need to know your display's specifications, such as resolution, refresh rate, and sync timings. Refer to your display's datasheet for these details. For the display we are using in this tutorial, the datasheet can be found here.
- Modify config.txt
- Add custom timing parameters in the
config.txtfile. Here’s an example for an 800x480 display at 60Hz for Raspberry Pi 3:
hdmi_cvt=800 480 60 6 0 0 0
hdmi_group=2
hdmi_mode=87
Parameter Definitions:
The custom timing string follows the format:
hdmi_cvt=
Where each parameter means:
- width: Display width in pixels (required).
- height: Display height in pixels (required).
- framerate: Refresh rate in Hz (required).
- aspect: Aspect ratio (
1=4:3,2=14:9,3=16:9,4=5:4,5=16:10,6=15:9). - margins: Set to
0to disable margins,1to enable them. - interlace: Set to
0for progressive,1for interlaced. - rb: Optional reduced blanking, set to
0for normal,1for reduced blanking.
The line
hdmi_group=2specifies the HDMI group. In this case, group 2 refers to a custom monitor setup, allowing you to define specific timing parameters.The line
hdmi_mode=87selects the HDMI mode. Mode 87 enables the use of custom timings set by thehdmi_cvtcommand.- For Raspberry Pi 4 and 5, in addition to the above settings, the following custom timings for dual HDMI outputs need to be added:
[HDMI:0]
hdmi_timings=800 0 40 24 72 480 0 13 3 29 0 0 0 60 0 32000000 6
[HDMI:1]
hdmi_timings=800 0 40 24 72 480 0 13 3 29 0 0 0 60 0 32000000 6
This configures custom timings for both HDMI outputs available on Raspberry Pi 4 and 5. Here’s a breakdown:
[HDMI:0] and [HDMI:1]: These refer to the two HDMI ports on the Raspberry Pi. HDMI:0 is the primary, and HDMI:1 is the secondary.
hdmi_timings=800 0 40 24 72 480 0 13 3 29 0 0 0 60 0 32000000 6: This sets a custom resolution and refresh rate for the connected display. Here's a brief breakdown of the values:
- 800: Horizontal resolution.
- 0: Horizontal polarity (0 = negative).
- 40: Horizontal sync pulse width.
- 24: Horizontal back porch.
- 72: Horizontal front porch.
- 480: Vertical resolution.
- 0: Vertical polarity (0 = negative).
- 13: Vertical sync pulse width.
- 3: Vertical back porch.
- 29: Vertical front porch.
- 0: Interlaced (0 = progressive).
- 0: Pixel repetition.
- 0: Aspect ratio (default).
- 60: Refresh rate in Hz.
- 0: Reduced blanking.
- 32000000: Pixel frequency in Hz.
- 6: Signal type (for specific HDMI modes).
This config sets a display resolution of 800x480 at 60Hz for both HDMI ports with specific timing parameters.
For more details on the custom mode parameters, refer to the Raspberry Pi Documentation on Custom Modes. For additional information on
hdmi_timings, visit the following link: Raspberry Pi hdmi_timings. - Add custom timing parameters in the
- Save the changes
- Eject the microSD card from your computer
Step 5: Test and Verify Custom Timings
- Insert the microSD card into your Raspberry Pi and power it on
- Verify that the display works correctly with the custom timings
- Adjust if necessary
If adjustments are needed, modify the config.txt file and repeat the process.
- Update your Raspberry Pi
On the Raspberry Pi, open a terminal by pressing Ctrl+Alt+T and run the following commands:
sudo apt updatesudo apt upgradesudo reboot
Your Raspberry Pi should now be running with the correct custom timings for your display. If you encounter any issues, refer to the troubleshooting section below for assistance.
Learn More
For more tutorials and insights, check out other tutorials:
Troubleshooting
Steps to troubleshoot common issues with your Raspberry Pi display.
- No display output: Double-check the values in the config.txt file and ensure the HDMI connection is secure.
- Display flickering or artifacts: Adjust the refresh rate or use a higher quality HDMI cable.
- Incorrect resolution or aspect ratio: Verify the hdmi_cvt, hdmi_group, and hdmi_mode parameters are set correctly.
- Intermittent display issues: Check for loose connections and ensure the Raspberry Pi is receiving sufficient power.
- For Raspberry Pi 4 and 5: If you encounter issues on either HDMI port, double-check the
hdmi_timingsfor bothHDMI:0andHDMI:1in theconfig.txtfile.
Conclusion
Setting custom timings for TFTs on Raspberry Pi (whether it’s a 3, 4, or 5) can greatly enhance display compatibility and performance. By following this guide, you should be able to configure your Raspberry Pi to work seamlessly with a variety of TFT displays, optimizing performance and compatibility through custom timings.
Latest Blog Posts
-
A Guide to TFT Display Interfaces
Display interfaces often get less attention than screen resolution or brightness, but they carry jus …Dec 16th 2025 -
Choosing the Right Display Resolution: A User-Friendly Guide
Display resolution is one of the most defining choices in product interface design. It determines ho …Dec 11th 2025 -
Arduino vs Raspberry Pi vs BeagleBone: Key Features and Differences
If you're working on an electronics project—whether it's for a DIY automated device, a digital sign, …Dec 8th 2025


